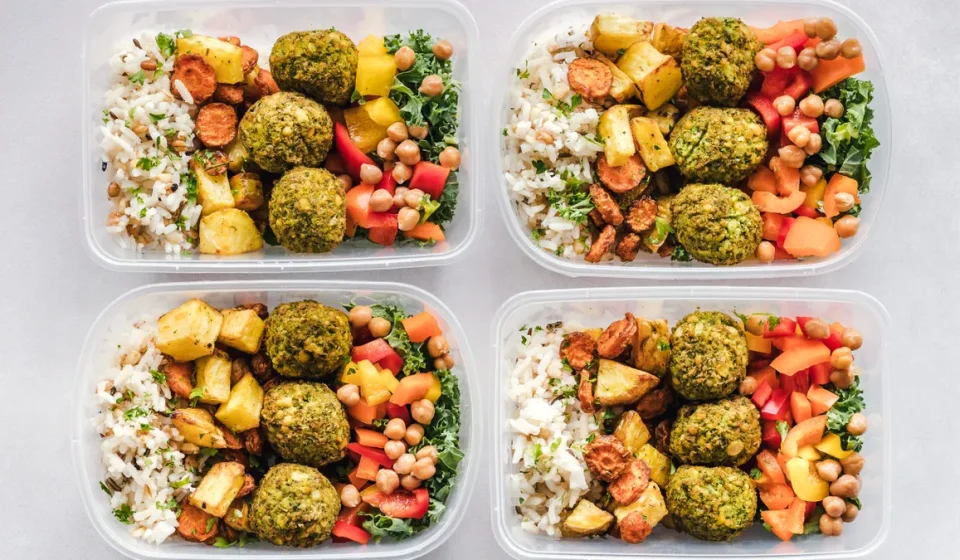
How to Make Your Kitchen Safe for a Night Shift Meal Routine

Last updated: October 22, 2026
Quick Answer: a safe night shift meal routine can start with 3 basics: cold storage, quiet prep, and fast cleanup. This article on How to Make Your Kitchen Safe for a Night Shift Meal Routine focuses on keeping food cold, tools close, and noise low so you can cook, store, and reheat meals at odd hours without waking anyone or creating a food safety problem. A simple, labeled setup near the fridge, microwave, and dishwasher usually works best.
What a night shift meal prep kitchen setup needs to do
A night shift meal prep kitchen setup needs to keep food cold, tools easy to reach, and cleanup quiet. That sounds basic, but late-night cooking changes the risk profile: you are more likely to rush, more likely to forget a container on the counter, and more likely to bang pans around when everyone else is asleep.
Therefore, start with the three appliances that do the most work: refrigerator, microwave, and dishwasher. Put them on a straight path if you can. The less you cross the kitchen at 1 a.m., the less you spill, forget, or wake somebody. Keep your timer visible from the stove or prep surface. Keep a label maker or preprinted labels near the containers, not in a drawer across the room.
A practical setup is about zones. One zone for raw ingredients, one for cooked food, one for dirty dishes. If your counter is small, you can still do this with trays or cutting boards. A 12-by-18-inch tray can act like a portable station: raw vegetables on one side, cooked items on the other, and a small bowl for scraps in the middle. The point is separation, not perfection.
Because of that, this page belongs with the broader sleep environment guide, but it stays focused on the kitchen side of the problem: food, timing, noise, and cleanup.
How do I prep meals safely for night shifts?

Safe night shift meal prep comes down to four habits: chill food fast, portion it cleanly, label it clearly, and reheat it fully. Those steps matter more than fancy recipes.
Use this core procedure for most workweek meals:
- Wash your hands with soap and water for 20 seconds before you start, then again after touching raw meat, eggs, or garbage. Clean hands reduce the chance of spreading bacteria across containers and handles.
- Clear one prep surface and one sink side so raw food never shares space with ready-to-eat food. A single cutting board for cooked items and a separate one for raw meat keeps cross-contamination down.
- Cook in batches that fit your containers, not in a giant pot you will forget on the stove. Two to four portions per recipe is easier to cool and refrigerate than a large uncovered pan.
- Move leftovers into shallow meal prep containers so they cool faster. The goal is to get food into the refrigerator promptly, not leave it sitting out while you answer messages or wash dishes.
- Label each container with the food name and date using a label maker or tape and marker. That keeps you from guessing at 2 a.m. when everything looks the same.
- Set a timer for cleanup and a second timer for food storage. Timers cut down on the common late-night mistake of forgetting food on the counter while you multitask.
- Reheat only the portion you will eat. A microwave-safe container with a vented lid reduces splatter and makes a smaller, faster meal than heating the whole batch every time. If a container is damaged, warped, or no longer seals well, check manufacturer guidance or a food-safety professional before using it again.
Since the goal is consistency, the best shortcut is not speed at the stove. It is a prep habit that makes speed safe. For food safety basics, the USDA Food Safety and Inspection Service has clear guidance on cooling, storing, and reheating leftovers, and the FDA Food Code gives a useful framework for temperature control in kitchens. If food safety is a serious concern in your household, a local health professional or food safety educator can help you adapt those rules to your routine.
Do not leave cooked food out for long while you shower or answer the door. That shortcut costs you control over time and temperature, which is the whole game in a night shift kitchen.
Keep ingredients ready without turning the kitchen into clutter
The easiest night shift kitchen is the one where tomorrow’s dinner needs almost no thinking. That means keeping a small, rotating set of ingredients ready in the refrigerator, freezer, and pantry.
Next, pick one shelf in the refrigerator for grab-and-go items: cooked grains, washed greens, chopped vegetables, sauces, and pre-portioned protein. Put the oldest items in front. A refrigerator with clear bins helps, but even cheap plastic bins or a wire shelf basket can keep things from disappearing behind half-used jars.
Use meal prep containers that stack evenly and seal well. Square or rectangular containers waste less shelf space than round ones. A 3- to 4-compartment lunch container can work for some shift meals, but it is less flexible if you want to reheat only part of the meal. Single-compartment containers are better for soups, rice bowls, pasta, and stews. Neither style is perfect; the right one depends on whether you want portion control or flexibility.
In particular, keep a small “assembly kit” together: oil, salt, pepper, a spoon, a can opener, and one cutting board. If those items live in separate drawers, you spend extra minutes hunting for them, and late-night cooking gets louder and messier. A drawer organizer or caddy is enough.
For the freezer, freeze items in flat packs when possible. Flat bags or containers stack better and thaw faster than bulky tubs. If you are freezing soup, chili, or sauce, leave enough headspace for expansion. The point is to make future meals easy to grab and reheat, not to create a frozen puzzle.
A common mistake is over-prepping. Five identical meals sound efficient until you hate them by day three. A better pattern is a base plus variations: rice with two sauces, chicken with different vegetables, or pasta with different proteins. That keeps ingredients useful without making the fridge look like a catering line.
How do I avoid waking others when cooking at night?

You avoid waking others by reducing impact noise, not by trying to cook in total silence. Most kitchen noise comes from cabinet doors, metal tools, running water, and pans hitting burners or counters.
Start with the loudest items. Put felt pads on cabinet doors if they slam. Set down pots and pans instead of dropping them. Use silicone spatulas, a wooden spoon, or a plastic bench scraper when possible, because they are quieter than metal utensils. Close the dishwasher door gently and run it after waking hours if your home layout makes that possible.
Then use the microwave for reheating when it makes sense. A microwave is quieter than a skillet, and it can handle many meals from a meal prep container with less fuss. A vented lid or microwave cover also cuts down on splatter, which saves you from scrubbing at midnight.
Pick quieter prep methods. Chop vegetables before the household goes to bed if you can. If not, use a cutting board with a damp towel underneath so it does not skid and clack against the counter. Keep the freezer and refrigerator open only as long as needed. A 30-second rummage sounds harmless, but repeated door noise carries.
Timers matter here too. A vibrating timer or phone timer on low volume can keep you from repeatedly checking the stove or oven. That removes the habit of opening doors, tapping pans, and muttering at the burner every two minutes.
The trade-off is real: quiet cooking can be slower. If you need to cook a crisp item or sear meat, that will make more noise than warming leftovers. On nights when quiet matters most, choose low-noise meals such as grain bowls, soups, pasta, or pre-cooked proteins. This is not the setup for someone who wants to fry bacon at 12:30 a.m. in an apartment with thin walls.
Sanitation after late-night cooking is what keeps the routine usable
Late-night sanitation matters because tomorrow’s food safety depends on what happens after the meal, not just during it. If dishes pile up, counters stay sticky, or the sink holds raw-food residue, the kitchen becomes harder and riskier to use the next night.
Consequently, clean in this order: trash, dishes, surfaces, floor. That sequence keeps you from wiping crumbs into a clean sink or stepping on food while you finish. Put perishables away before you sit down. If you are too tired to finish the whole kitchen, handle the refrigerator and the raw-food surfaces first.
Keep a dishwasher load ready if you have one. A dishwasher is a real advantage for shift workers because it contains mess and reduces handwashing noise. Load it with the dirtiest items first: cutting board, knife, prep bowls, then utensils. If you wash by hand, use hot water and a brush or sponge you replace regularly. A smelly sponge is a fast way to make a clean kitchen feel dirty.
Specifically, disinfect high-touch spots when raw meat or eggs were involved: faucet handles, fridge handles, light switches, and cabinet pulls. A kitchen may look clean while still carrying residue on the places you touch without thinking. One wipe can prevent the next meal from starting with a contamination problem.
Also watch wetness. Leaving counters damp invites slip hazards and makes the kitchen feel unfinished, which is how people ignore cleanup until the next shift. A dry towel and a 2-minute wipe-down are enough for most nights.
If you want one hard rule, make it this: no food, no sponge, no towel should stay in a warm, damp heap overnight. That is the easiest way to create smell, mess, and extra work.
Common mistakes that make a night shift kitchen unsafe
The biggest mistakes are the ones that save 30 seconds and cost you an hour later. Leaving food out too long is one of them, but it is not the only one.
One mistake is using the same board or knife for raw chicken and ready-to-eat food. That creates cross-contamination and turns a simple meal into a food safety risk. The fix is simple: separate tools or wash thoroughly between tasks.
Another is overfilling the refrigerator. A crowded fridge blocks airflow and makes it harder to keep food consistently cold. If containers are jammed into every corner, your system is too full. Reduce batch size or freeze part of the food instead.
A third mistake is relying on memory instead of labels. Unmarked containers waste food because nobody wants to guess what is in them after three days. A label maker solves that cleanly. If you do not have one, tape and marker work fine.
Another common problem is cooking one giant meal after a long shift and expecting it to feel easy. That usually leads to fatigue, sloppy cleanup, and unnecessary noise. It is better to prep 2 to 3 meals at once and repeat the system twice a week than to do everything in one marathon session.
The last mistake is choosing the wrong container. Thin plastic that warps in the microwave or leaks in the fridge creates a mess and ruins leftovers. Use microwave-safe meal prep containers with lids that close securely, and retire damaged ones before they become a nuisance. If you are unsure about a container, check the label or ask a manufacturer, extension service, or food safety educator before reusing it.
This setup is not for someone who wants a fully stocked chef’s kitchen at 2 a.m. It is for someone who wants a quiet, repeatable routine that keeps food safe and the house calm.
What should stay on the counter and what should go away?
Only the items you use every night should stay on the counter. Everything else should be stored away so the kitchen stays quiet, fast, and easy to clean.
However, keep the essentials visible: knife, cutting board, timer, dish towel, and one container stack. If you use a label maker often, keep it within arm’s reach of the containers. If you reheat meals nightly, keep the microwave path clear and the front of the appliance free of clutter. A clean counter reduces both noise and decision fatigue.
Move away the things that slow you down: appliances you do not use at night, tall utensil jars that tip easily, and decorative items that collect dust and force you to work around them. The more the counter looks like a workspace, the faster you can finish and clean up.
A good test is whether you can make one meal in under 15 minutes of active work without hunting for tools. If you cannot, the setup is not ready for a shift routine yet. It may still look tidy, but it is not operational.
Key Takeaways
- A good night shift kitchen setup is built around cold storage, fast reheating, and low noise.
- Labeling, shallow containers, and a timer do more for safety than fancy gear.
- Quiet cooking depends on the microwave, soft-close habits, and keeping noisy tasks short.
- Cleanup matters as much as cooking because overnight residue turns into tomorrow’s problem.
- The right system is simple enough to repeat when you are tired.
How do I prep meals safely for night shifts?
Safe prep means controlling time, temperature, and cross-contamination. Use clean hands, separate raw and ready-to-eat foods, portion meals into shallow meal prep containers, and refrigerate them promptly. Label each container with the food and date so nothing gets forgotten. For detailed food-safety basics, the USDA Food Safety and Inspection Service and FDA Food Code guidance are good references.
What foods are best to keep in a night shift kitchen?
The best foods are the ones that reheat well and stay useful for several days, such as cooked rice, pasta, roasted vegetables, soups, stews, and pre-cooked proteins. Keep them in the refrigerator in portioned containers or freeze extra servings flat. Choose foods that fit your routine, not just your preferences, because the easiest meal is the one you will actually eat at 1 a.m.
How do I avoid waking others when cooking at night?
Use quieter tools and quieter methods. Close cabinets gently, use the microwave when you can, set a timer instead of repeatedly checking the stove, and prep noisier ingredients earlier in the day. Put a towel under your cutting board so it does not skid. If you need to sear, fry, or run the dishwasher, do it only when the household schedule can tolerate the noise.
Drafted with AI; not yet reviewed by a person.